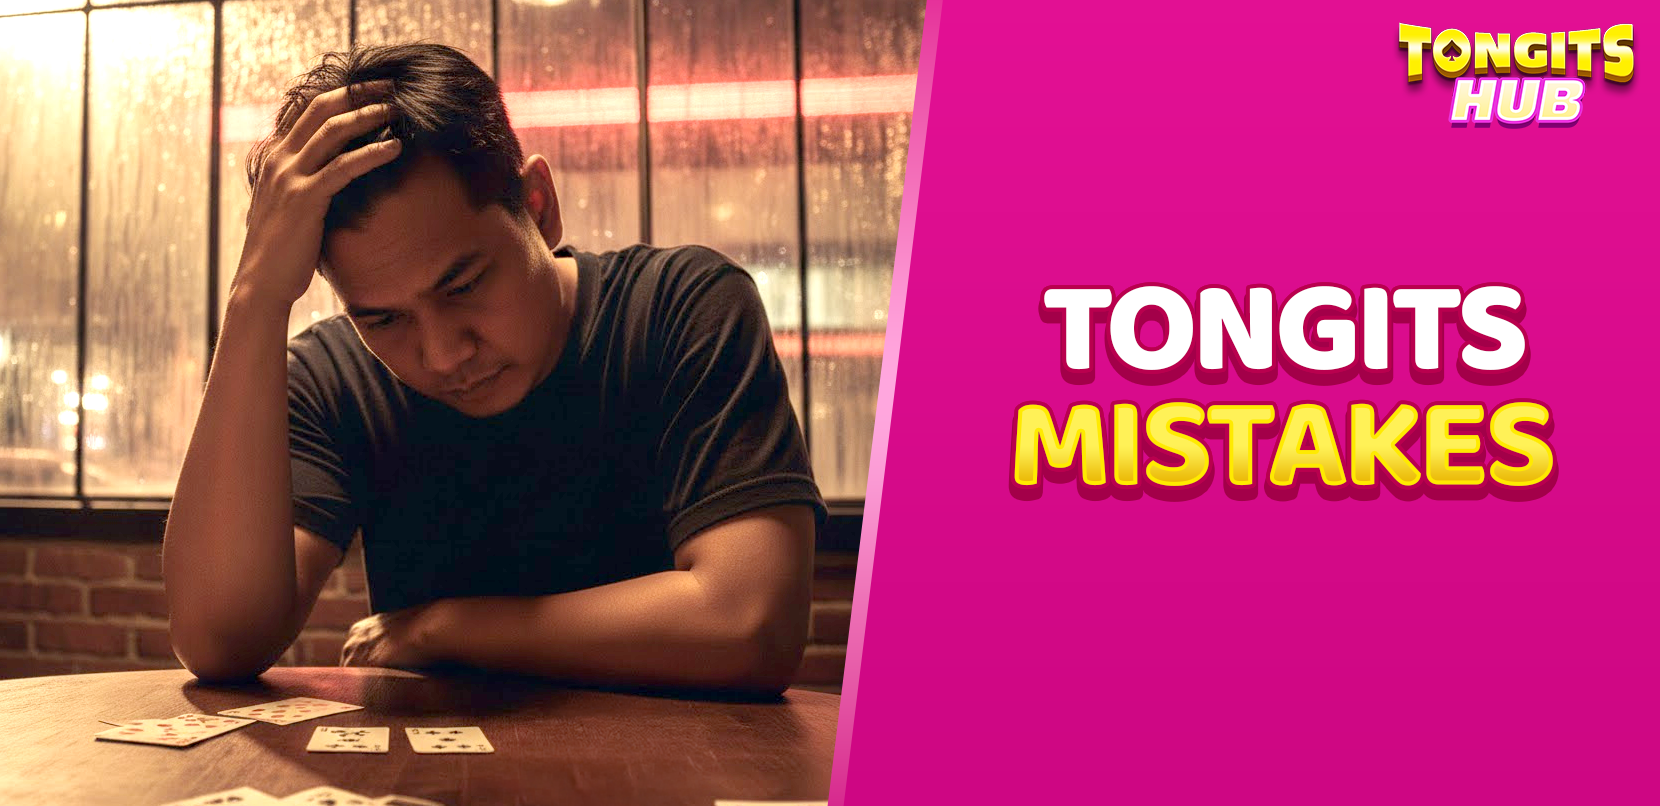
Tongits Burn (Sunog) Explained: Rules, Penalties & How To Avoid Getting Burnt
Getting Burnt (Sunog) in Tongits is every player's nightmare - an instant loss with harsh penalties, regardless of how good your hand is. Understanding what causes Burn, how to avoid it, and the strategic implications is crucial for anyone serious about winning at Tongits.
This comprehensive guide explains everything about the Burn mechanic, from the basic rules to advanced strategies that keep you safe while using Burn as a tactical weapon against opponents.
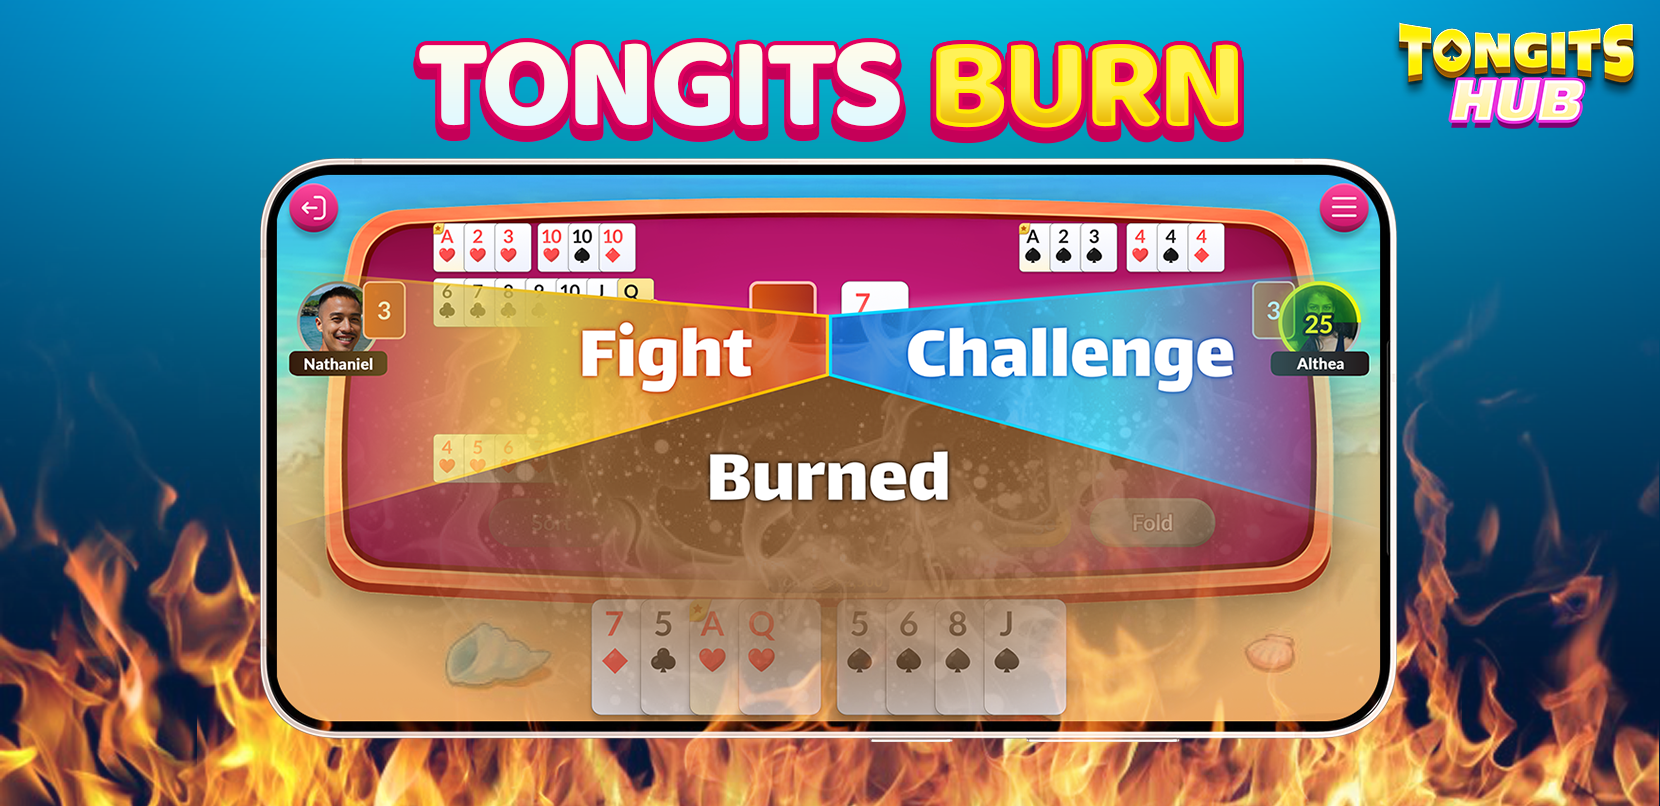
What is Burn (Sunog) in Tongits?
Burn (called Sunog in Filipino, which literally means "burned") is a special penalty condition in Tongits that results in an automatic loss, regardless of your point total.
The Burn Rule Simply Explained
You get Burnt when:
- The round ends by any method (Tongits call, Challenge, or draw pile exhaustion)
- You have zero exposed Melds on the table
- It doesn't matter if you have low points - if you have no visible Melds, you're Burnt
Why the Burn Rule Exists
The Burn rule serves several important purposes in Tongits game:
- Forces active play: Without the Burn rule, players could sit passively holding low cards without contributing to the game's pace
- Rewards bold players: Players who take the risk to expose Melds are protected from this harsh penalty
- Adds strategic depth: The threat of Burn creates interesting tactical decisions about when to expose your first Meld
- Prevents passive play: You can't just hold onto a perfect hand waiting forever - you must engage with the game
Burn vs. Regular Loss
Understanding the difference is crucial:
Regular Loss:
- You have exposed Melds but lost on points
- You pay based on your point total
- Standard penalties apply
Burn Loss:
- You have NO exposed Melds
- Automatic loss regardless of points
- Severe penalty multipliers apply
- Often the harshest loss in the game
When Does Burn Happen in Tongits?
Burn can occur in several game-ending scenarios. Let's examine each one:
Scenario 1: Someone Calls "Tongits"
The most common Burn situation:
What happens:
- A player uses all their cards in Melds and Sapaws
- They discard their final card and call "Tongits"
- The round ends immediately
- All players without exposed Melds get Burnt
Example:
- Player 1 calls "Tongits" (instant win)
- Player 2 has two exposed Melds with 8 remaining points (safe - pays 8 points)
- Player 3 has only 4 points but NO exposed Melds (BURNT - pays severe penalty)
Even though Player 3 had lower points than Player 2, they get Burnt and face a much worse outcome!
Scenario 2: Challenge Called
What happens:
- A player calls Challenge
- All players reveal their hands
- Players with no exposed Melds are instantly Burnt
- They cannot participate in the Challenge at all
Example:
- Player 1 calls Challenge with 7 points and 2 exposed Melds
- Player 2 has 12 points with 1 exposed Meld (can Fight or Fold)
- Player 3 has 9 points but NO exposed Melds (automatically Burnt, cannot even Fight)
Important: You cannot call Challenge yourself without at least one exposed Meld. Attempting to do so results in an immediate Burn.
Scenario 3: Draw Pile Runs Out
What happens:
- The Closed Pile has no cards left
- The round ends automatically
- Player with the lowest points wins
- All players without exposed Melds get Burnt
Example:
- Draw pile exhausted
- Player 1: 15 points with 3 exposed Melds (participates in comparison)
- Player 2: 11 points with 1 exposed Meld (wins with lowest points)
- Player 3: 8 points with NO exposed Melds (Burnt despite lowest points)
Again, having exposed Melds is more important than having low points!
The "Almost Safe" Myth
Many beginners believe these FALSE statements:
❌ "I have very low points, so I won't get Burnt" ❌ "I can just expose my Meld right before someone wins" ❌ "Burn only happens if I have high cards"
The Truth: ✅ Points don't matter - only whether you have exposed Melds ✅ The round can end suddenly without warning ✅ Burn happens regardless of your hand quality
Burn Penalty: How Much Does It Cost?
The Burn penalty is significantly harsher than regular losses. The exact penalty varies by game variant and house rules.
Common Burn Penalty Structures
1. Double Points Penalty (Most Common)
- Your current hand points are doubled
- Example: You have 15 points → You pay 30 points penalty
2. Fixed Penalty
- You pay a predetermined amount regardless of your points
- Common amounts: 50 points, 100 points, or 3x the base bet
3. Maximum Penalty
- You pay the maximum possible hand value
- Usually equivalent to having all face cards (around 100+ points)
4. Multiplied Standard Penalty
- Your points × a multiplier (usually 3x to 5x)
- Harshest in online competitive Tongits
Burn Penalty Comparison Example
Let's see how devastating Burn can be:
Scenario: Player holds 12 points, round ends
| Outcome | Penalty Paid |
|---|---|
| Regular loss (with exposed Melds) | 12 points |
| Burn - Double Points | 24 points (2x) |
| Burn - Triple Points | 36 points (3x) |
| Burn - Fixed Penalty | 50 points |
| Burn - Maximum Penalty | 100 points |
As you can see, getting Burnt can cost you 2-8 times more than a regular loss!
Multi-Player Burn Situations
What happens when multiple players get Burnt simultaneously?
Scenario:
- Player 1 calls "Tongits"
- Players 2 and 3 both have no exposed Melds
- Both Players 2 and 3 get Burnt
Penalties:
- Each Burnt player pays the full Burn penalty independently
- Player 1 (winner) receives Burn penalties from both players
- This makes calling "Tongits" extremely profitable when opponents are unprepared
How to Avoid Getting Burnt in Tongits
The best Tongits players never get Burnt. Here's how they do it:
Strategy 1: The Safety Meld (Most Important)
Expose your first Meld as quickly as possible, even if it's not perfect.
The Safety Meld Approach:
- Form a simple 3-card Meld early in the game
- Don't wait for a 4-card Set or long Run
- This "safety Meld" protects you from Burn immediately
Example:
- You draw three 7s (7♠ 7♥ 7♦) on Turn 2
- Expose them immediately - you're now safe from Burn
- You can expand this Meld or create others later
Why this works:
- Protection from Burn is more valuable than keeping secrets
- You can still win with exposed Melds
- Other players can't use this against you since you're already safe
Strategy 2: Priority Melding
Form and expose Melds based on Burn protection, not just points:
Decision Framework:
Option A: Hold cards for a potentially bigger Meld
- Risk: Round might end before you complete it (Burn)
- Reward: Slightly better point reduction
Option B: Expose a smaller Meld now
- Risk: None (you're Burn-proof)
- Reward: Guaranteed safety + eligibility to win
Smart Choice: Almost always Option B, especially in mid-to-late game
Strategy 3: Sapaw Doesn't Save You
Common Misconception: "I can just Sapaw onto opponents' Melds and I'll be safe from Burn"
❌ WRONG! Sapaw (laying off onto opponents' Melds) does NOT count as having exposed Melds ✅ CORRECT: You must have your own exposed Melds to avoid Burn
Example:
- Player 1 exposes K♠ K♥ K♦
- You Sapaw K♣ onto their Meld
- Round ends
- You have NO Melds of your own exposed
- Result: You get Burnt!
The Right Approach:
- Expose at least one Meld of your own first
- Then feel free to Sapaw as much as you want
Strategy 4: Track Game Progress
Know when Burn danger is highest:
High Burn Risk Situations:
- Draw pile is running low (under 10 cards)
- An opponent has exposed multiple strong Melds
- An opponent has been Sapawing frequently
- You haven't exposed any Melds yet
Action: If you spot these signs and have no exposed Melds, form and expose one immediately, even if it costs you strategic advantage
Strategy 5: The "Emergency Meld"
Sometimes you need to create a Meld purely for Burn protection:
When to create an emergency Meld:
- Draw pile has ~5 cards left
- Opponents look ready to call Tongits or Challenge
- You haven't exposed anything yet
How to do it:
- Pick from the discard pile if it completes a Meld (you must expose it immediately)
- Sacrifice your planned strategy to get something on the table
- Accept slightly sub-optimal Melds for the safety they provide
Using Burn as a Strategic Weapon
Advanced players don't just avoid Burn - they weaponize it against opponents.
Strategy 1: The Burn Trap
Keep opponents from exposing Melds by controlling the discard pile:
How it works:
- Track which cards opponents need for Melds
- Avoid discarding those cards
- Hold cards that complete your opponents' potential Melds
- Force them to either wait (risk Burn) or expose weaker Melds
Example:
- You notice Opponent has been collecting 8s (has discarded cards around 8)
- You hold 8♠ and 8♥ even though you don't need them
- Opponent can't complete their Set of 8s
- They must either expose a weaker Meld or risk Burn
Strategy 2: Fast Tongits to Burn Opponents
Aim to call "Tongits" when you sense opponents have no exposed Melds:
Recognition signals:
- Opponent has picked up several cards but exposed nothing
- Opponent keeps discarding diverse cards (suggests no clear Melds forming)
- Early game (first 5-6 turns) when players are still forming hands
Your action:
- Accelerate your play
- Take calculated risks to complete your Melds faster
- Call "Tongits" to catch them Burnt
Payoff:
- Burnt opponents pay severe penalties
- Makes your "Tongits" win much more profitable
Strategy 3: Challenge to Burn
Call Challenge when you suspect opponents have no exposed Melds:
When to use this:
- Mid-game and you have at least 1 exposed Meld
- Opponents haven't exposed anything yet
- You have decent (not great) points - maybe 12-15
What happens:
- Opponents without Melds get Burnt automatically
- Even if you don't have the lowest points among "safe" players, Burnt players pay you severe penalties
- This can turn a mediocre hand into a winning position
Example:
- You: 13 points with 1 exposed Meld
- Player 2: 10 points with 2 exposed Melds
- Player 3: 8 points with NO exposed Melds
Result of your Challenge:
- Player 3 gets Burnt (pays severe penalty to both you and Player 2)
- Player 2 beats you on points (you pay them normally)
- But you profit from Player 3's Burn penalty
- Net result: You might break even or profit despite losing the point comparison
Strategy 4: Psychological Pressure
Use the threat of Burn to make opponents play poorly:
Tactics:
- Expose multiple Melds quickly (makes you "safe" and signals aggression)
- Pick up pace of play (creates time pressure)
- Watch opponents as they check their cards nervously
- They'll rush to expose suboptimal Melds just to avoid Burn
Advantage:
- Opponents expose weak Melds early
- You know exactly what they have
- They have fewer options for strategic play
Common Burn Mistakes and Misconceptions
Even experienced players make these Burn-related errors:
Mistake 1: "I'll Expose Later"
The Mistake: Thinking you have time to expose a Meld later when the "perfect moment" comes.
Why it's wrong:
- The round can end instantly and unexpectedly
- Someone can call "Tongits" on any turn
- The draw pile empties faster than you think
Correct approach: Expose your first Meld as soon as it's formed (typically Turn 2-4)
Mistake 2: "My Points Are Too Low to Get Burnt"
The Mistake: Believing that having low points protects you from Burn.
The Reality:
Example: You have only 3 points (A♠, A♥, A♦)
But they're not exposed as a Meld
Someone calls "Tongits"
You get BURNT and pay severe penalty
Having 3 points doesn't matter!
Correct approach: Expose those three Aces as a Set immediately - then you're safe
Mistake 3: "Sapaw Counts as Exposed Meld"
The Mistake: Thinking that laying off (Sapaw) cards onto opponents' Melds protects you from Burn.
The Reality:
- Sapaw only counts toward reducing your points
- Sapaw does NOT count as having exposed Melds
- You still get Burnt if you have no Melds of your own
Correct approach: Expose your own Meld first, then Sapaw freely
Mistake 4: "I Can't Meld Yet Because I'll Give Away My Strategy"
The Mistake: Keeping Melds hidden to surprise opponents later.
The Reality:
- In Tongits, there are no "hidden" Melds that protect you
- Opponents can't target your exposed Melds to hurt you
- The Burn risk far outweighs any strategic advantage of secrecy
Correct approach: Expose Melds openly - it's required for safety and you can still win
Mistake 5: "Burn Is Just Bad Luck"
The Mistake: Blaming Burn on bad cards or luck.
The Reality:
- Almost every Burn situation is preventable
- Good players rarely get Burnt
- Burn is usually the result of poor planning or passive play
Correct approach: Take responsibility and adjust your strategy to include early Meld exposure
Advanced Burn Scenarios and Edge Cases
Scenario 1: Drawing From Discard Pile
Question: If I pick from the discard pile to complete a Meld, am I immediately safe from Burn?
Answer: YES! The rules require you to immediately expose any Meld formed with a discard pile card. This means you're instantly protected from Burn.
Strategic use:
- If Burn danger is high and you have no Melds
- Pick from discard pile if possible (even for a weak Meld)
- Instant Burn protection
Scenario 2: Multiple Melds in Hand
Question: I have 2 complete Melds in my hand but haven't exposed either. Am I safe?
Answer: NO! Melds in your hand don't count. You must expose at least one on the table.
Scenario 3: Expanding Exposed Melds
Question: I exposed a 3-card Set earlier. Later I draw the 4th card and add it. Does this still protect me from Burn?
Answer: YES! Expanding an existing exposed Meld maintains your Burn protection.
Scenario 4: Opponent Challenges Without Melds
Question: What happens if someone calls Challenge but they themselves have no exposed Melds?
Answer: They get Burnt immediately! You cannot call Challenge without at least one exposed Meld. This is an embarrassing and costly mistake.
Conclusion: Making Burn Work For You, Not Against You
Mastering the Burn (Sunog) mechanic is essential for success in Tongits. Remember these core principles:
✅ Always expose at least one Meld early (turns 2-5 ideally) ✅ Don't wait for perfect Melds - safety first, optimization second ✅ Sapaw doesn't protect against Burn - you need your own exposed Melds ✅ Use Burn as a weapon - target opponents who haven't exposed Melds ✅ Never call Challenge without exposed Melds - instant Burn!
The Golden Rule of Burn Avoidance: "A simple 3-card Meld exposed on Turn 2 is better than a masterful hidden hand that gets Burnt on Turn 8."
By understanding and respecting the Burn rule, you'll avoid costly penalties and gain a significant strategic advantage over less experienced players. Make Burn your ally, not your enemy!


.jpg)
.jpg)

.jpg)
.jpg)
.jpg)
.jpg)
.jpg)
.jpg)
.jpg)
.jpg)
.jpg)
.jpg)